Have you developed a Dash application which works locally, and now want to share it with the world? Let’s see how to deploy your Python web app on a server 24/7 for free, so anyone can access it through a link.
In this post we’ll have a look on how to pubish a Dash application: First, we’ll briefly introduce Dash (it’s not in the scope of this post to explain the development of a Dash application). Sencondly, we’ll see how to set up a web app using pythonanywhere. Lastly, we’ll se how to make your Dash application run 24/7 and make it available through a link.
What’s Dash
Dash is a Python framework for building web applications and enables you to build dashboards using pure Python. Dash is open source, and its apps run on the web browser.
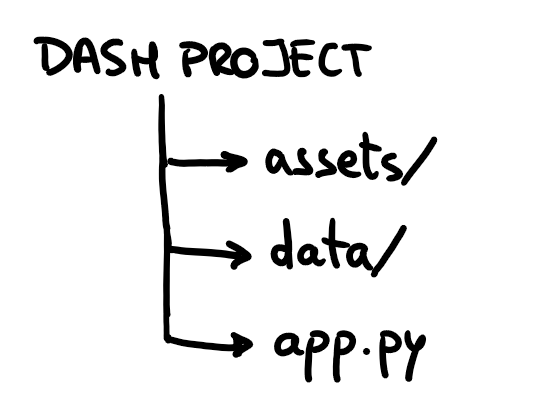
A Dash project usually has the following structure:
app.py: the main Python app.
assets folder: contains resources for fonts, images, and CSS.
data folder: contains the data files used by the application.
How to Publish your Dash App
Once you’ve built your Dash application, let’s get into how to share it with the world!🌍
Choose the Python version you used to develop the app.
You can check the Python version on your computer by running the following code in Python:
import sys
print(sys.version)
4. Leave the path by default and click Next.
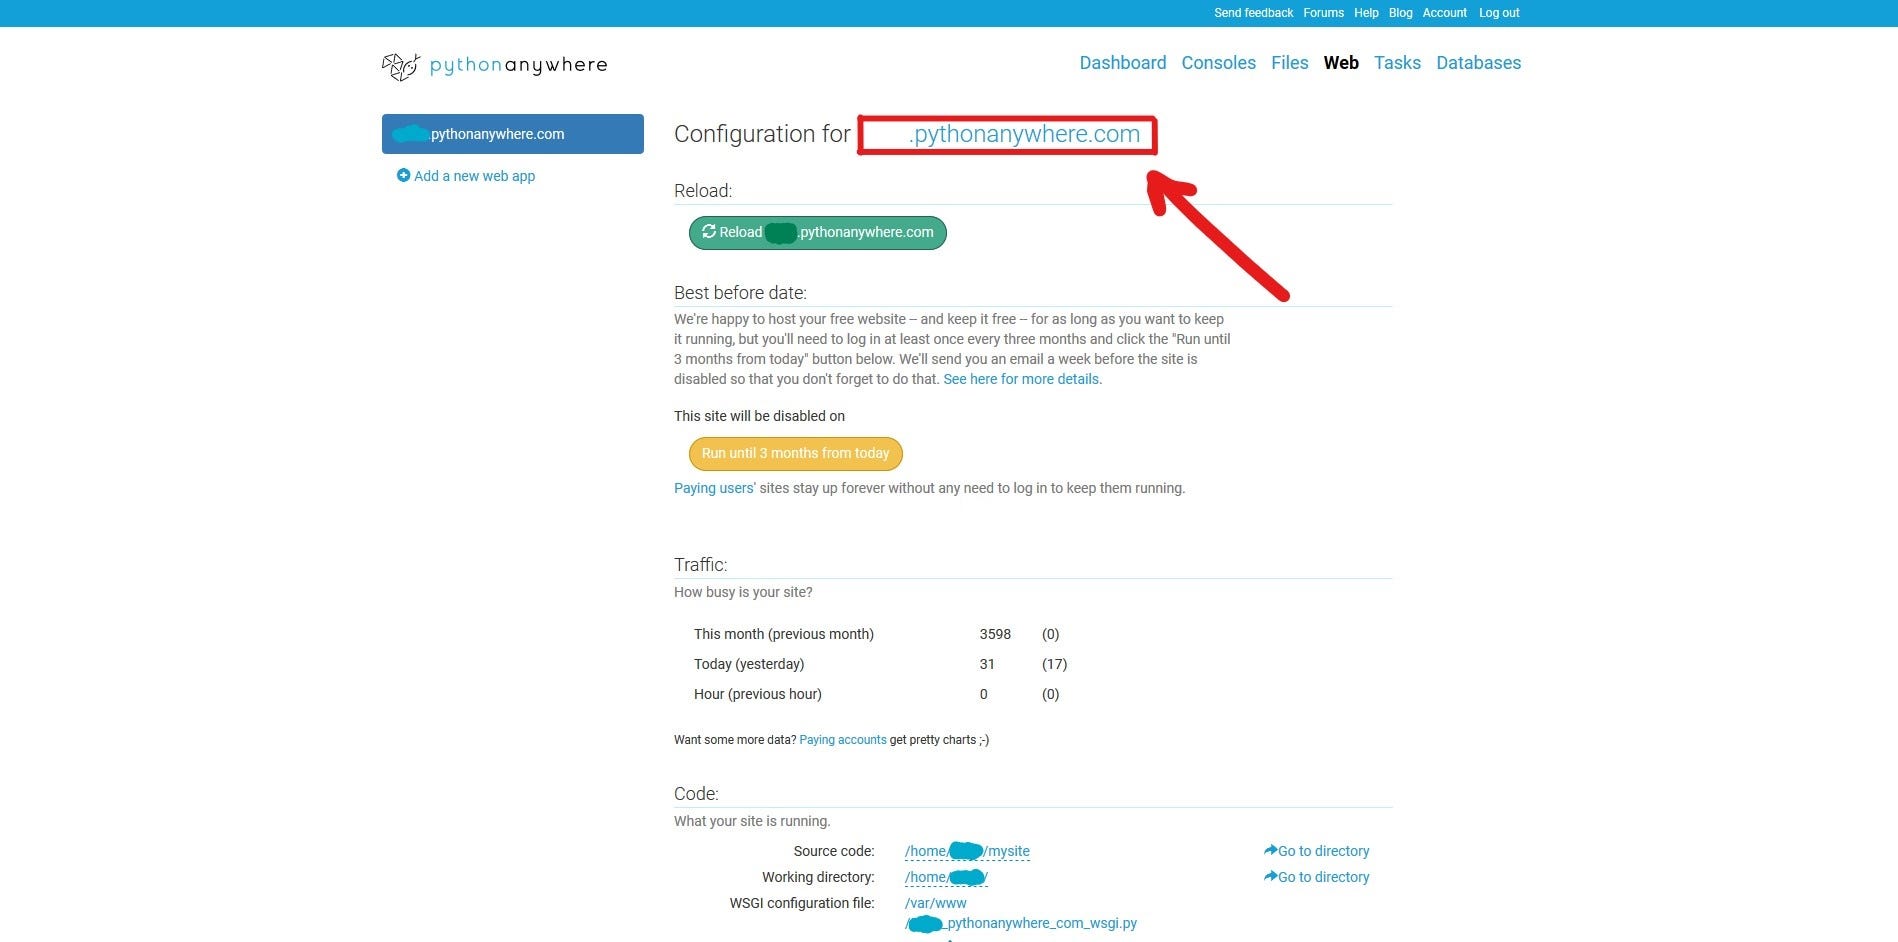
Now your web app is set up and can be accessed through the link that you’ll find in the web dashboard:
When you enter you’ll see the default app, which we’re now going to replace by our Dash app.
👉IMPORTANT: This is the link from which anyone will be able to access you web app.
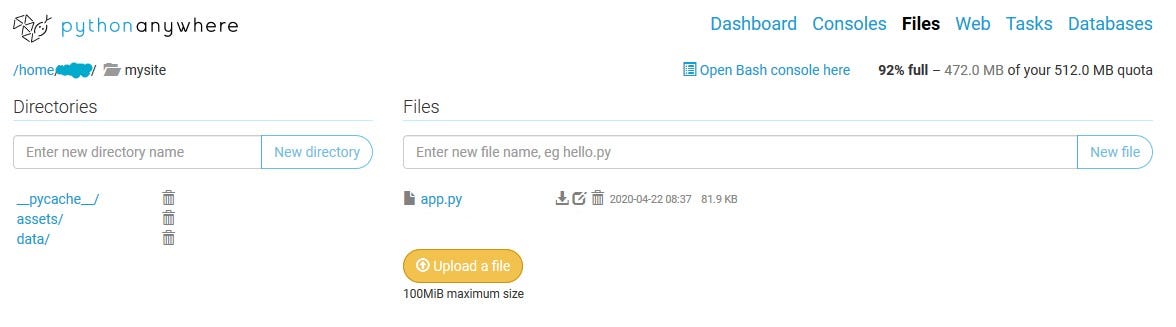
Upload your files📤
On the top bar go to Files and, in the Directories sidebar, click on mysite/. Inside, you’ll find a file named flask_app.py. This file contains the default code that is currently running as your web app. You can just delete this file.
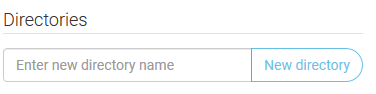
Now you can start uploading the files of your own project. You should be able to recreate the same file structure that you have locally in your computer, by creating new folders and uploading the files.
Create new folder.
Once you uploaded all the files you should have something like this inside the mysite/ folder. Make sure app.py (the main dash app file) is not inside any other folder.
👉Note: if your app needs to access data from other folders, once you upload the necessary files, remember to change the path inside app.py . You can just click on the file to open it to replace the path. For example, if I wanted to access a file inside the data/ folder, the new path would be /home/user_name/mysite/data/file.csv.
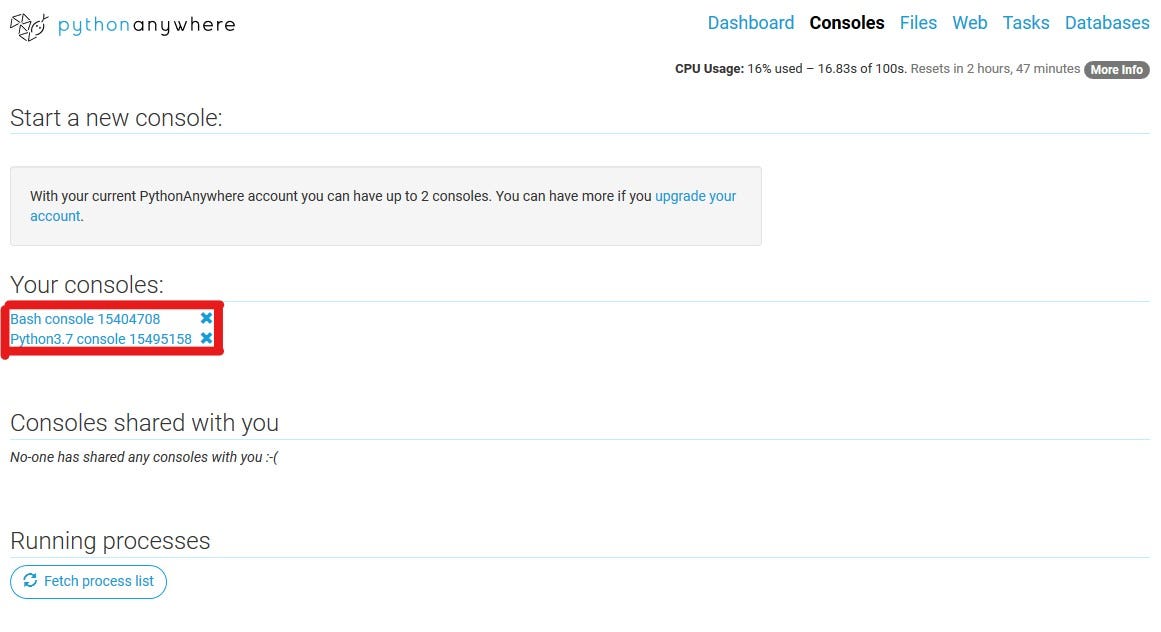
Install the dependencies🎒
On the top bar, go to Consoles. Here, you’ll find the Bash console, which is the usual terminal that you’ll find in your computer, as well as the Python console.
Enter the Bash Console to install any Python dependency that you should need for the normal functioning of your app.
👉Quick Tip: try to install the same library versions of your computer to ensure you don’t get any unexpected errors.
Last step🏁
On the top bar, go to Web and in the Code section open the WSGI configuration file.
You’ll see a line that says:
from flask_app import app as application
and you’re going to replace that for:
from app import app
application = app.server
Click Save and inside the Web tab click Reload to update the app with the new files.
Congrats!🥳 Now anyone can access the link [your-username].pythonanywhere.com to use your app 🎉🎉🎉
If you were to see any errors, you can always check the Error log file. You can find it in the Web tab, inside the Log files section.
If you’re reading this, thank you for your time and I really hope you got some value from this post😊
See you in the next one! 🚀
(P.S. If something isn’t clear, I’m glad to help🤓)
Once in a while, great companies partner with Udacity to offer scholarships and help students build highly in-demand skills in the field of Data Science.
This time, Amazon Web Services sponsored the AWS Machine Learning Scholarship Program, in which we’ll have the opportunity to learn the foundations, as well as more advanced skills to become professional Machine Learning Engineers, while learning to use some of the most in-demand tools and technologies in the AWS ecosystem.
Requirements
The applicant must be 18 or older🔞
Who should apply
This program is oriented to developers of all skill sets, from beginner and intermediate machine learning professionals.
How it works
The program takes place 100% online and has 2 phases:
Phase 1: Scholarship Foundations Course
Phase 2: Full Scholarship for a Udacity Nanodegree program
Phase 1: Scholarship Foundations Course
In the foundations course, students will learn how to write production-level code and practice object oriented programming, as well as deep-learning techniques to apply in real-world scenarios.
“The course will help students develop object-oriented programming skills including writing clean and modular code and also introduce key AWS machine learning technologies, namely Amazon AI Services and Amazon AI Devices and apply their skills in the AWS lab environment.”
From May 19, 2020 you’ll be able to enroll for free in the Foundations Course and you will have until July 31, 2020 to complete it.
This course should take you around 3-5 hours per week if you start in May, but you can follow the lessons at your own pace. Once you complete the course, you’ll receive a certificate for having completed the course. Finally, you will receive instructions to take an online assessment quiz (within the aforementioned period) to be eligible for the Phase 2.
Phase 2: Full Scholarship for a Udacity Nanodegree program
The top 325 scorers will receive the full scholarship for Udacity’s popular Nanodegree program: AWS Machine Learning Engineer.
These kind of Nanodegrees are usually priced at around 400$/month, so it’s definitely an opportunity you don’t want to miss!
In this nanodegree you will get the chance to learn advanced machine learning techniques and algorithms.
“This program will offer world-class curriculum, a groundbreaking classroom experience, industry-leading instructors, thorough project reviews, and a full suite of career services.”
Students selected for Phase 2 who complete the full Nanodegree program will be awarded a Nanodegree certificate.
The nanodegree students should expect to invest about 10 hours per week during the program, which should run for 2 months.
How to enroll
The enrollment opens on May 19, 2020. However you can sign up right now to be notified when the course opens its (virtual) doors.
Some personal thoughts
Even if you don’t pass to the Phase 2, I think it’s worthy to complete the Foundations Course, as it’s a great opportunity to sharpen all the basics of ML and learn about these highly on-demand technologies in the AWS ecosystem.
You’ll be able to interact with other students in the same community and help each other. Additionally, if you were looking for some motivation to start learning ML, this is a great challenge to get in the habit of studying a bit every week while having a sense of community that will encourage you to continue making progress.
I will definitely enroll to this course, let me know if you’re joining me!✨
Thank you for your time and I really hope this post was informative 😊
Usually, when we all start learning Machine Learning, we find a ton of information about how to build models, which of course is the core of the topic. But there’s an equally important aspect of ML that is rarely taught in the academic world of Data Science, and that is how to deploy these models. How can I share this useful thing that I’ve done with the rest of world? Because, at the end of the day…that’s the purpose of our job right? Making people’s lives easier 😊.
In this post, we’ll learn how to deploy a machine learning model to the cloud and make it available to the rest of the world as an API.
The Workflow
We’re going to first store the model in Firebase Storage to deploy it to AI Platform where we can version it and analyse it in production. Finally, we’re going to make our model available through an API with Firebase Cloud Functions.
Image courtesy of the author.
What’s the AI Platform? 🧠
AI Platform is a service of Google Cloud Platform (GCP) that makes it easy to manage the whole production and deployment process by not having to worry about maintaining your own infrastructure and making you pay only for usage. This will enable you to scale your product massively for fast growing projects.
You can try this and many more experiments on your own FOR FREE by making use of GCP’s 12 month, $300 free trial to get you started.
What are Firebase Cloud Functions?🔥
Essentially, for the purpose of this post, the cloud function will work as an API. We will make the predictions of our model available through a link that any person can make requests to, and receive the response of our model in real time.
What you’ll need
A model ready to share ✔
A Google account ✔
yep, that’s all
Getting started
Just for the sake of simplicity, I’m going to assume the model was developed in Python and lives in a Jupyter Notebook. But of course, these steps can be adapted to any other environment.
1. Sign in to Firebase
First, sign in to the Firebase Console with your Google account and create a new project. Now you’re inside the Firebase Dashboard, go to the project settings > Service accounts > Firebase Admin SDK, (in this case) you select the Python option and click on Generate new private key. This will give the JSON file of your service account that you can save in your notebook’s directory.
Then, install the Firebase Admin SDK package: pip install firebase-admin
2. Store model in Firebase Storage
Once you’ve trained and tested your model it’s ready to upload to AI Platform. But before that, we need to first export and store the model in Firebase Storage, so it can be accessed by AI Platform.
If you’re using a notebook, create a new cell at the end and add the following script. This will enable the usage of your firebase account:
import firebase_admin
from firebase_admin import credentials
from firebase_admin import firestore# Use a service account
if (not len(firebase_admin._apps)):
	cred = credentials.Certificate(r'service_account.json')
	firebase_admin.initialize_app(cred)db = firestore.client()
Now, to run the following code you’ll need to get the Project ID, which you can find again in your Firebase project settings.
Once we have our Project ID we upload the model by running the following code (you should first change it with your Project ID).
from sklearn.externals import joblib
from firebase_admin import storagejoblib.dump(clf, 'model.joblib')
bucket = storage.bucket(name='[YOUR PROJECT ID HERE].appspot.com')
b = bucket.blob('model-v1/model.joblib')
b.upload_from_filename('model.joblib')
print('model uploaded!')
Now we can verify that the model has been correctly uploaded by checking in Firebase Storage inside the specified directory (which in our case is model-v1/).
3. Deploy model in AI Platform
Now that the model has been stored, it can be connected to AI Platform.
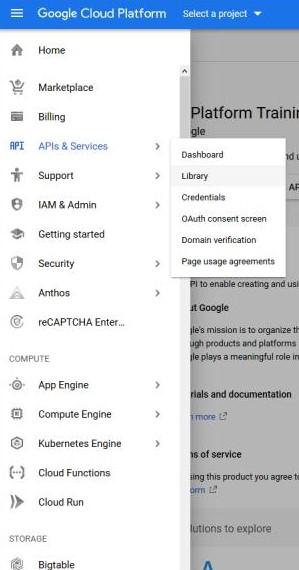
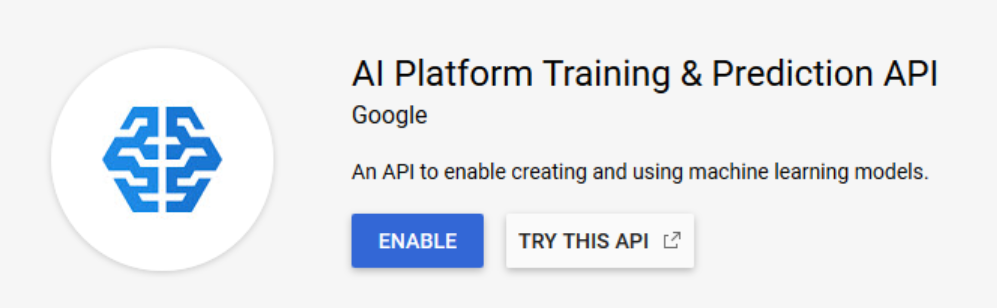
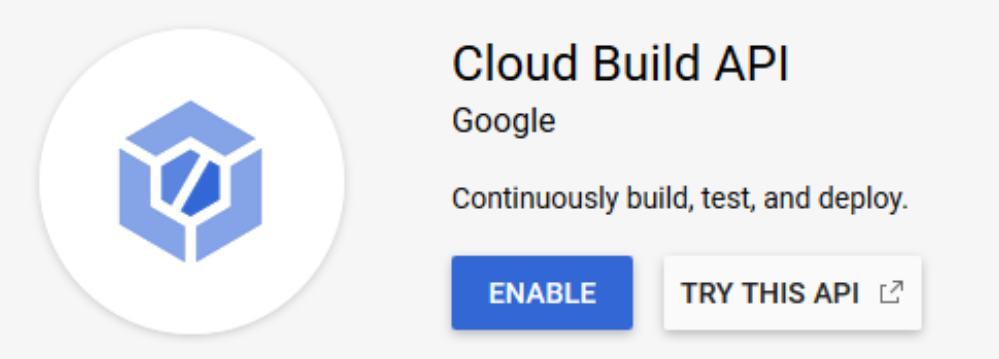
We need to enable a couple of APIs in Google Cloud Platform. On the left panel, inside the Library section, we look for the APIs “AI Platform Training & Prediction API” and “Cloud Build API” and enable them.
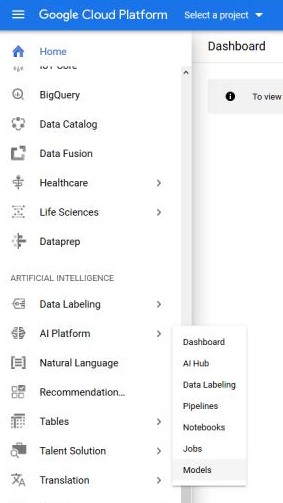
Now, on the left panel we click on AI Platform > models and we Create new model and input the corresponding information.
Once we’ve created the model it’s time to create a version of it, which will point to the .joblib file that we previously stored. We click on the model > new version and fill the information. It’s important that we choose the same Python version that we used for training the model. We choose scikit-learn as the framework. When specifying its version, we can get it by running the following code in our notebook.
import sklearn
print('The scikit-learn version is {}.'.format(sklearn.__version__))
When choosing the ML Runtime version, you should select the recommended one. The machine type can be left by default for now.
Finally, we specify the folder in which our .joblib file is located. It’s important to select the folder, not the file! The rest of the fields can be left by default and save. At that moment, an instance of our model will be deployed in AI Platform.
Now, we’ll be able to make predictions from the command line or from other Google APIs, such as Cloud Function, as we’ll see next. Additionally, we’ll be able to get some performance metrics on our model.
4. Create the Cloud Function
Let’s see how to implement the function!
We’re going to run some commands on the terminal, but for that, you’ll need to ensure you have Node.js installed in your computer. The following commands are specific for Windows but you should be able to use them in Unix and Mac OS devices by adding sudo at the beginning of each of the commands.
Let’s start by installing the Firebase client: $ npm install -g firebase-tools
We access the Google account: $ firebase login
Initialize a new project directory (make sure you’re in the directory you want to initialize it in):$ firebase init
When running this last command you’ll be asked several questions. When asked about the Firebase project that you want in the directory, you have to choose the one that contains the ML model that we previously exported. Select JavaScript as programming language. We don’t use ESLint, so answer no. And finally, answer yes to the installation of dependencies with npm.
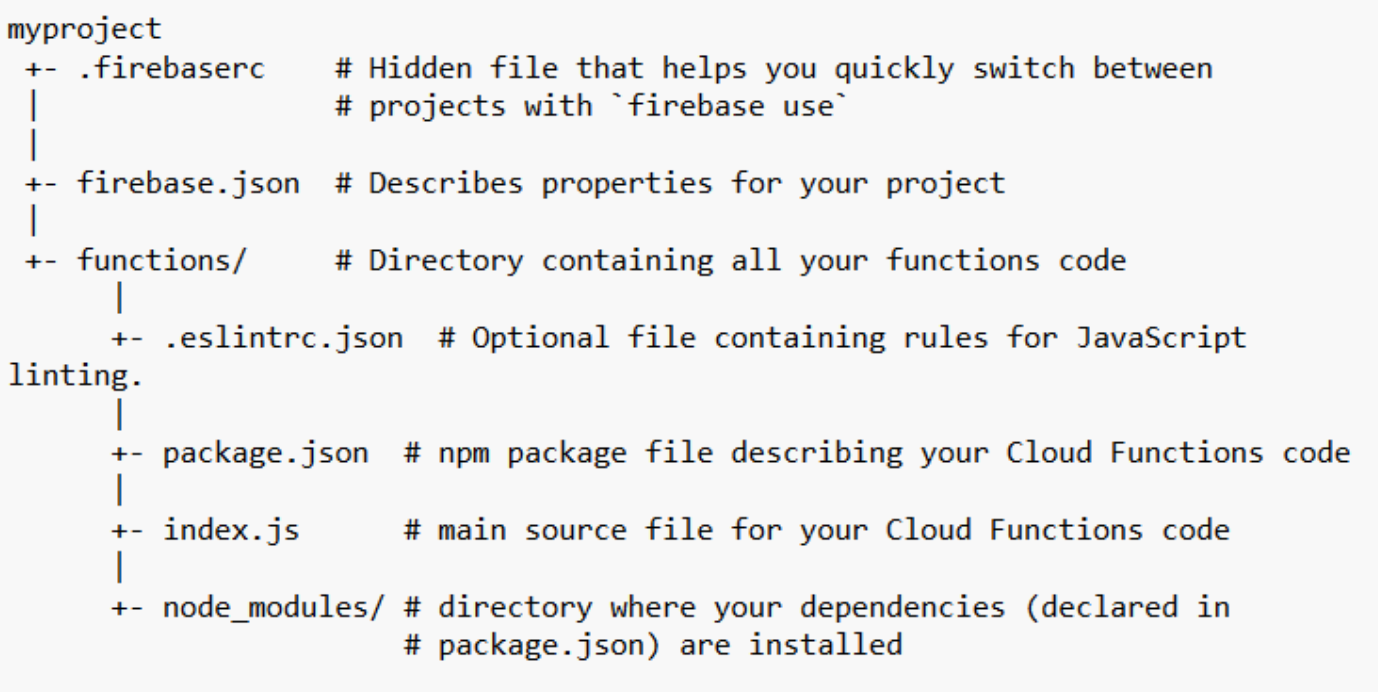
Once the project has been created, the directory will have the following structure:
Inside this directory, we’ll only modify the index.js and the package.json files.
We install the packages of the Google API: $ npm i googleapis
Now we check the packages have been installed correctly by opening the package.json file. In case you want to use any other external package in your code you should also add it in this file with its corresponding version.
For now, it should have a structure similar to this:
firebase-admin: It’s the Admin SDK, which allows to interact with Firebase from privileged environments.
firebase-functions: It’s an SDK for the definition of Cloud Functions in Firebase.
googleapis: It’s the client library Node.js for the usage of Google APIs.
Now let’s see the implementation of the function (we are editing the index.js file), which you can also find in this GitHub repository. As an example, I’ll be using the code to access a simple fake-account detection model.
We start by loading the firebase-functions and firebase-admin modules.
We specify the input values of the function. In this example, I’m getting some data about the social media account that my model will use to classify as fake or not. You should specify the fields that you plan to input afterwards to your model.
After that, we build the input of the model, that is, the input parameters that we’ll send to the model to get the prediction. Note that these inputs should follow the same structure (order of features) with which the model was trained.
Now, let’s make the request to the Google API, this request needs authentication, which will connect our Firebase credentials with Google API.
const model = "[HERE THE NAME OF YOUR MODEL]"; const { credential } = await googleapis_1.google.auth.getApplicationDefault();
After storing the name of our model in a variable (the name should be the same you gave it in the AI Platform console), we make a prediction call to AI Platform by sending our credentials, the name of the model and the instance that we want the prediction for.
Once we’ve created the cloud function that accesses the model, we just need to upload it to Firebase to deploy it as an API.
To upload the Firebase function we run the following command in the terminal: $ firebase deploy --only functions
Once it has finished loading, a URL is obtained through which the function will be accessible, which can be found by logging into Firestore, in the Functions section, under Request in smaller print.
And that’s all, now your model is up and running, ready to share! 🎉🎉🎉
You can make requests to this API from a mobile app, a website…it could be integrated anywhere!
6. Test your API with Insomnia
This is, of course, an optional step, if you followed the previous guidelines, your model should be ready to receive requests. However, as a programmer, I like to test things to check everything works fine.
My favourite way to test APIs is by using Insomnia. Insomnia is a REST API client that lets you test your APIs easily. This free desktop app is available for Windows, MacOS and Ubuntu. Let’s check if our newly made API works properly!
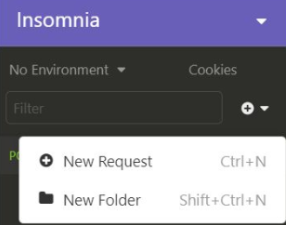
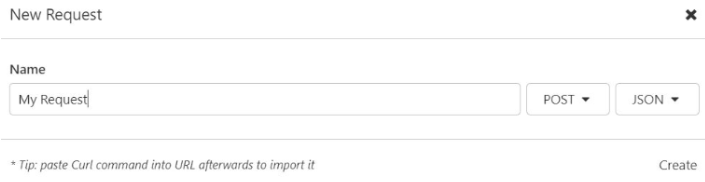
Once we’ve installed the desktop app we can create a new request.
We’ll write the request name and choose POST as a method and JSON for its structure.
Once we’ve created the request, we copy the URL of the cloud function and we paste it in the top bar.
We will now write the request following the format that we specified in the function, in my case, it’d be like this:
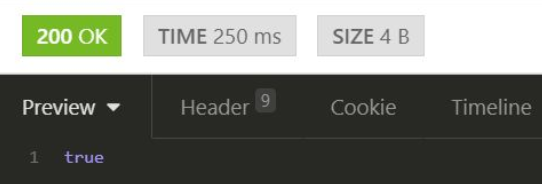
We now hit SEND and we’ll get the response, as well as the response time and its size. If there were any errors you should also receive the error code instead of the 200 OK message.
The response that you get will, of course, vary depending on your model. But if everything works fine, then congrats! You’re ready to share your model with the rest of the world! 🌍
If you made it this far, thank you for your time and I hope you got some value from this post😊