58a32864e59e203d64a070e700e269d3
Categories
 Elsa Scola
58a32864e59e203d64a070e700e269d3
58a32864e59e203d64a070e700e269d3

In this post I’ll let you have a glimpse into my first weeks as an Amazon SDE. I’ll let you know my first impressions, as well as some interesting lessons I’ve learnt right away from one of the greatest companies in the world. Note: All the views expressed in this post are mine, and in no way I’m representing Amazon.
When I first got the offer I couldn’t process it. I hadn’t even graduated from college and I was just being offered to work at this giant company that was already part of my day to day life. To make it clear, I’m a Prime member, Alexa’s #1 fan, and I’m continuously trying to convince people around me to get a Kindle (check out this post if you wanna know why).
It took me a moment to realize how great of an opportunity this was, not only on a professional level (which is obvious), but in terms of the kind of impact that I could have. Was I going to contribute on improving the lives of millions of people? People like myself, my family or friends? I couldn’t even envision what was ahead.
I ended up joining the Amazon Fashion team as a front-end engineer in Madrid.
As I’m writing this post it’s actually my fourth week working at Amazon. I’m going to describe my own on-boarding experience, it can differ from one individual to another, but the steps are mostly the same.
First day. Early in the morning, I had the “opening meeting” with my manager, where he introduced me to the platform I would be using for the upcoming weeks. It’s a guidance platform for the on-boarding process, that contains content specifically tailored to you and your work position. For example, in my case, there’s a learning path to follow day by day, in which I can find internal educational videos, blog posts, talks, step-by-guides and quizzes to ensure I’ve absorbed the important knowledge. I’m regularly learning more about the internal philosophy at Amazon, and how to use some of the tools I’ll be working with in my team. This is not to say the only thing you do for the first weeks is just completing the course, not at all, you’re actually expected to gradually start working on small tasks and combine them with the training. In my case, I was given my first task on Monday second week.
Second day. I started attending the daily stand-ups which helped me understand the project management dynamics.
Third day. I had the chance to meet the person that would be my on-boarding buddy. The on-boarding buddy helps solving any technical doubts that may arise during the training, as well as questions around the job, tools, and practically anything that comes to your head. In my case, it’s a senior engineer that kindly introduced me to how the internals work at amazon, and currently solves many of my newbie doubts.
During the whole first week I devoted the majority of my time to learning at the on-boarding platform. I spent the majority of my learning time trying to understand how code changes and deployment process work, alongside different internal technologies.
I did find that it could be a bit messy to learn that many technologies one after the other. It’s not necessarily a bad methodology, but I’m a very visual person, and so I really prefer to first have a broader picture and see the links between the concepts before diving in. So I made my own schema, which my manager encouraged to turn into digital form in order to share it internally. I like that they support us to share knowledge and seek to improve things.
During the second week I was already given some small tasks, with the support of senior engineers.
On the third week I was sending code for review and deployment.
And by this week (fourth week) I already have some of my code in production. (yay🎉)
The on-boarding continues. Even if it’s been a month working at Amazon, it really doesn’t feel like it. I’m still learning on the on-boarding platform and on my own. It’s always Day 1.
I didn’t quite know what to expect from a company like Amazon. As a recent graduate I felt my opinion wouldn’t be taken into account in such a big company as people would just assume I have no experience. I ended up seeing the complete opposite, whenever me or my fellow on-boarding mate suggest ideas they’re always listened attentively, I never feel treated as a newbie and I’m often encouraged to work on my proposals.
Each week every team member has a 30 min informal meeting with the manager. This weekly time is specifically dedicated to talk about anything, except for your current tasks. You get the chance to explain more personal concerns to your manager, career prospects, topics that interest you, or seek advice.
Something that strikes me on a very positive way is the great support given by the manager to achieve whatever you want, even if that means leaving the team. The manager’s goal is to make you feel as happy as possible and help you reach your goals. Including a complete change of path, country, or team.
Once you’ve discussed your interests with the manager, he’ll try to assign to you those tasks that are related to the topics that you most enjoy, or that will be more helpful in order to achieve your goals. He also gives freedom to propose projects related to you preferences that can benefit the team, even if it’s not inside the most immediate concerns of the team.
This can seem counter-intuitive, as it rarely happens in more conventional corporate companies, however, makes total sense. The happier you are at a company the greater is the chance to continue working there, and continue providing the knowledge and experience to other teams. This also increases the performance of employees and their motivation to work.
It can get overwhelming, sure. Amazon is such a big company it’s easy to get lost on the details and feel you know nothing. But the truth is, no one knows it all. The key is to focus on communicating, you’re not expected to know how things work right away. On my part, these few weeks I’ve been asking a lot of questions, no one seems bothered by it, on the contrary, my team-mates seem happy to answer my doubts and contribute to my learning process.
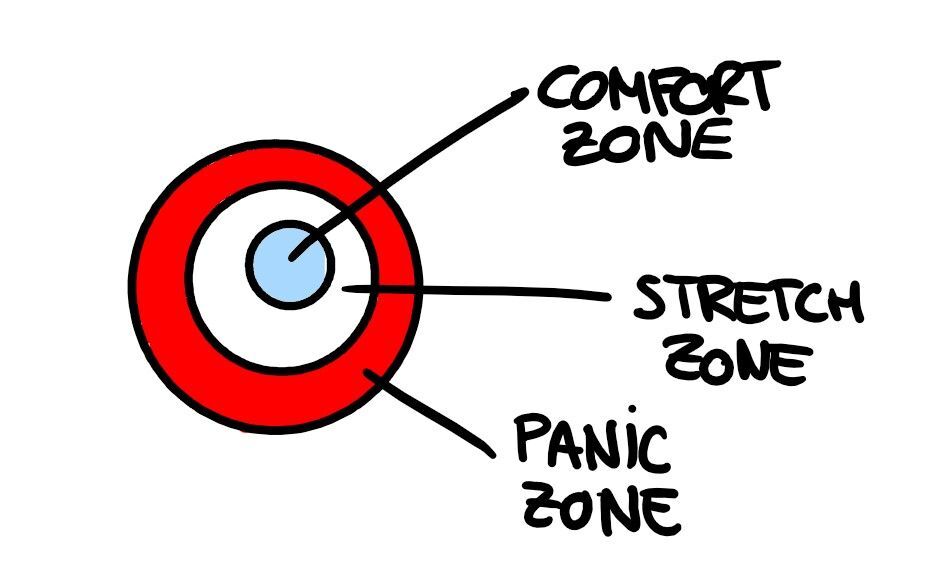
The manager also checks quite frequently how we’re feeling with the workload, and puts emphasis on making us communicate if we ever enter the panic zone. This helps avoiding burnout and keeping the team healthy.
After speaking to some of the senior members of the team, I came to realize that we all feel a bit impostors and kind of spend most of the time not knowing much of what is going on. This is completely normal, Amazon is huge, and it’s impossible to know it all. I’ve been told that Amazon does not really care much about hiring experts on one topic, it tries to hire adventurers, people who are willing to try, dive deep and persist on the face of the unknown. In the end, many of us, despite not feeling completely qualified for the job, ended up applying anyways.
Overall, my on-boarding is proceeding smoothly. I’m glad to be working in such a friendly and caring environment. There’s still a long way to go, and I’ll make sure to continue writing about it.
If you’re reading this, thank you for your time and I really hope you got some value from this post. See you in the next one!
I’ve linked some resources in case you want to dive deeper in what Amazon culture looks like.
GitHub is one of the most popular services for hosting software development version control using Git. If you still aren’t familiar with Version Control and Git, you can check out my previous post, The Git Cheat Sheet, where I explain the basics.
As a developer, you might feel comfortable working on your own local repository using version control. However, collaboration is crucial, as most of the time, you won’t be working by yourself on a project. You’ll be working with a team at your company, or perhaps with people you don’t even know from around the globe. Whether you want to work on smaller projects, or in huge open-source projects, collaboration is an important skill to have as a developer.
GitHub makes it easy to collaborate on a version control project. So, in this post, we’ll learn in a practical way the basics of how to collaborate using GitHub.
Use this command when you want a local repository to communicate with a remote repository from GitHub. Basically, with this command you’re telling your computer to create a connection between your local repo and the specified remote repo, which will be referred to as origin (it’s a shortname).
$ git remote add origin <https://github.com/username/repository.git>
When you clone a remote repo into your local device this connection is done automatically.
My remote repo’s shortname is origin and the commits that I want to push are on the master branch. So I’ll use the following command to send my commits to the remote repository on GitHub: $ git push origin master
To sync the local repository with the remote we need to use git pull. Similarly to git push, you provide the shortname for the remote repository and then the name of the branch you want to pull in the commits.
$ git pull origin master
If you don’t want to automatically merge the local branch with the remote tracking branch then you wouldn’t use git pull, instead, you would use git fetch. You might want to do this if there are commits on the remote repository that you don’t have but there are also commits on the local repository that the remote one doesn’t have either. In this case, you want to fetch the remote changes to get them in your local branch and then perform a merge manually. Then you can push that new merge commit back to the remote.
You can think of the git pull command as doing two things:
The git fetch command is just the first step. It just retrieves the commits and moves the tracking branch. It does not merge the local branch with the tracking branch.
When you fork a repository, you’re creating an identical copy of that repo and storing it in your profile. Modifying the forked repo will not affect the original.
When collaborating with other developers on a project, it can be useful to know who did what. git shortlog will show you the commits grouped by author.
You can add the flags -s to see just the number of commits and -n to sort them numerically: $ git shortlog -s -n
We need to be as clear as possible when making changes in a collaborative project. This will help other developers understand what we did.
Let’s imagine you made three consecutive commits that were all minor typo fixes, the best thing to do here is to combine those three commits into one.
For this example, you would use: $ git rebase -i HEAD~3
git rebase will move commits to a new base. In this example, HEAD~3 means three before HEAD (HEAD is your current location).
It looks like you’re now ready to collaborate on GitHub! 🎉 I know the learning curve can be steep sometimes, but it’s definitely worth sticking to it. Hope this was a helpful introduction for you 😊
Have you developed a Dash application which works locally, and now want to share it with the world? Let’s see how to deploy your Python web app on a server 24/7 for free, so anyone can access it through a link.
In this post we’ll have a look on how to pubish a Dash application: First, we’ll briefly introduce Dash (it’s not in the scope of this post to explain the development of a Dash application). Sencondly, we’ll see how to set up a web app using pythonanywhere. Lastly, we’ll se how to make your Dash application run 24/7 and make it available through a link.
Dash is a Python framework for building web applications and enables you to build dashboards using pure Python. Dash is open source, and its apps run on the web browser.
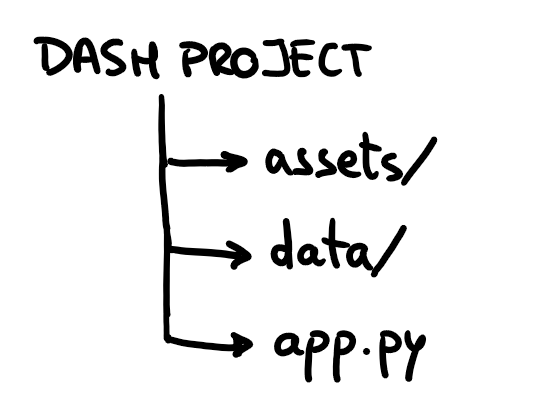
A Dash project usually has the following structure:
Once you’ve built your Dash application, let’s get into how to share it with the world!🌍
Sign up to pythonanywhere.com by creating a Beginner account.
On the top bar go to Web > Add a new web app :
You can check the Python version on your computer by running the following code in Python:
import sys
print(sys.version)
4. Leave the path by default and click Next.
Now your web app is set up and can be accessed through the link that you’ll find in the web dashboard:
When you enter you’ll see the default app, which we’re now going to replace by our Dash app.
👉IMPORTANT: This is the link from which anyone will be able to access you web app.
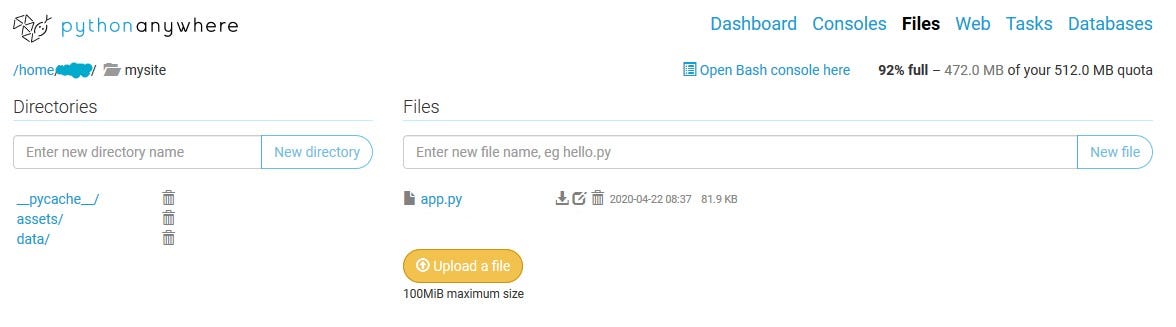
On the top bar go to Files and, in the Directories sidebar, click on mysite/. Inside, you’ll find a file named flask_app.py. This file contains the default code that is currently running as your web app. You can just delete this file.
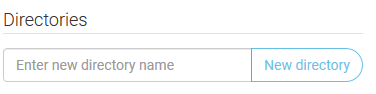
Now you can start uploading the files of your own project. You should be able to recreate the same file structure that you have locally in your computer, by creating new folders and uploading the files.
Once you uploaded all the files you should have something like this inside the mysite/ folder. Make sure app.py (the main dash app file) is not inside any other folder.
👉Note: if your app needs to access data from other folders, once you upload the necessary files, remember to change the path inside app.py . You can just click on the file to open it to replace the path. For example, if I wanted to access a file inside the data/ folder, the new path would be /home/user_name/mysite/data/file.csv.
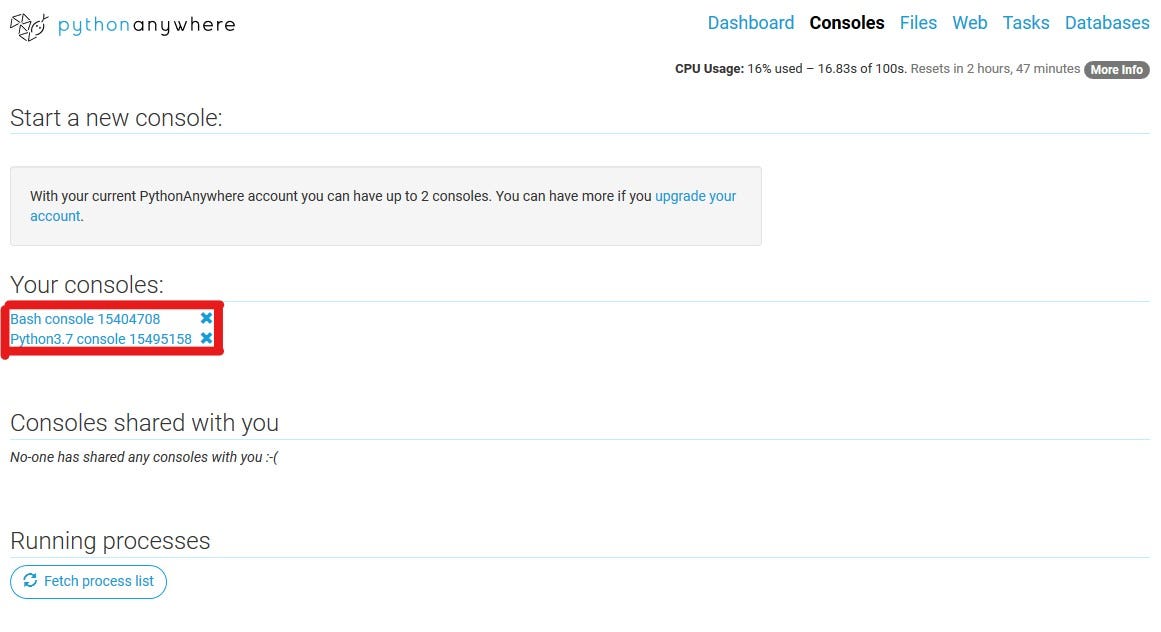
On the top bar, go to Consoles. Here, you’ll find the Bash console, which is the usual terminal that you’ll find in your computer, as well as the Python console.
Enter the Bash Console to install any Python dependency that you should need for the normal functioning of your app.
👉Quick Tip: try to install the same library versions of your computer to ensure you don’t get any unexpected errors.
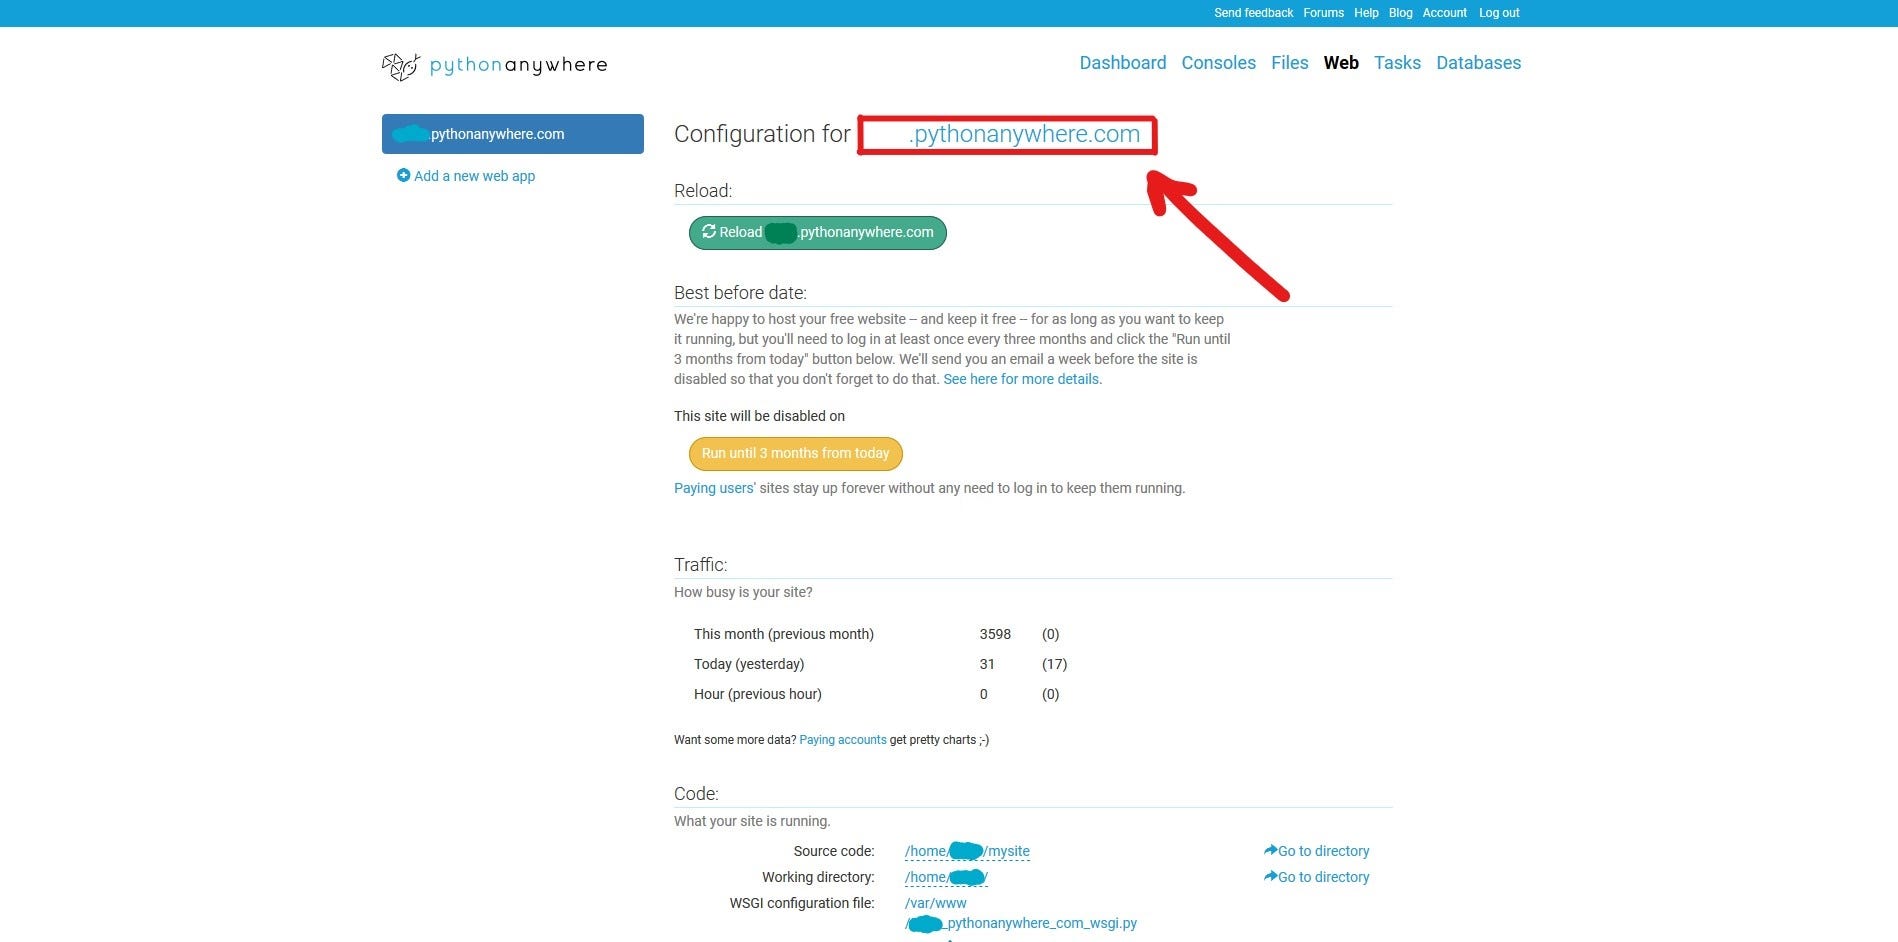
On the top bar, go to Web and in the Code section open the WSGI configuration file.
You’ll see a line that says:
from flask_app import app as application
and you’re going to replace that for:
from app import app
application = app.server
Click Save and inside the Web tab click Reload to update the app with the new files.
Congrats!🥳 Now anyone can access the link [your-username].pythonanywhere.com to use your app 🎉🎉🎉
If you were to see any errors, you can always check the Error log file. You can find it in the Web tab, inside the Log files section.
If you’re reading this, thank you for your time and I really hope you got some value from this post😊
See you in the next one! 🚀
(P.S. If something isn’t clear, I’m glad to help🤓)